Select  on the Map Toolbar to edit the current layer. Alternatively you can click
  next to any layer on the Layer Portal to edit that layer's details.
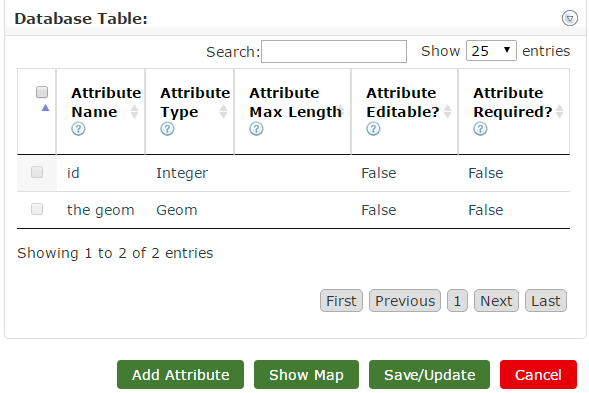
Scroll down to database table. Displayed here is the list of attributes that belong to your layer.

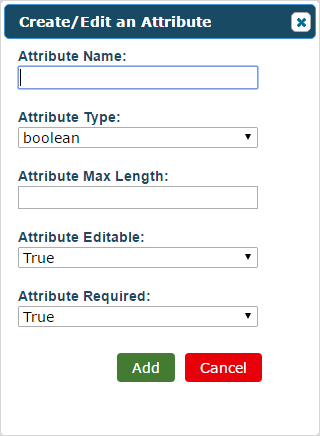
Here, you can add custom attributes to your layer. Click Add Attribute to open the Create/Edit Attribute panel.

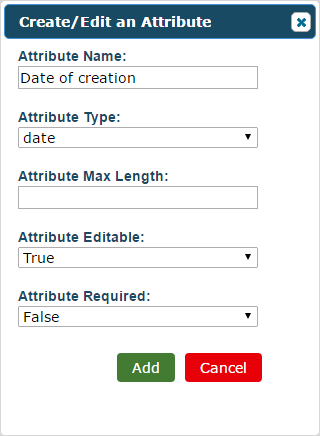
Attribute Name - Give the attribute a name
Attribute Type - Select the type of attribute you wish to add
Attribute Max Length - Limit the number of characters that can be entered for the attribute where applicable (doesn't affect dates etc.).
Attribute Editable - Select whether or not the attribute is editable when editing a feature on the layer.
Attribute Required - Select whether or not the attribute is required when creating a feature on the layer.

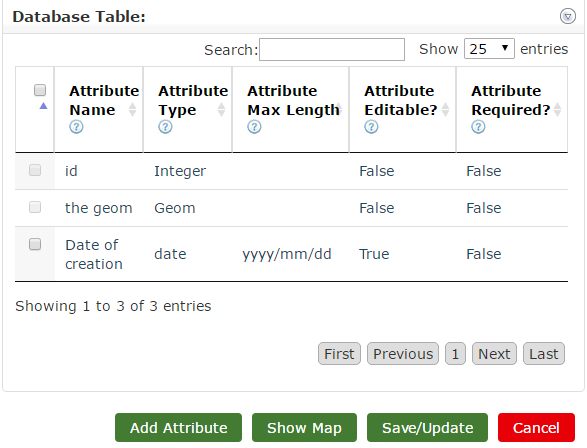
Select Add to add the attribute. It will then be added to the database table.

You'll notice the check box next to the added attribute is active. Click this and the Edit and Delete buttons will appear. Click Edit to reopen the Create/Edit Layer panel if you want to make changes to the selected layer or click Delete to remove it completely. You can select several attributes and delete them all at once.
Select Save/Update to save changes.