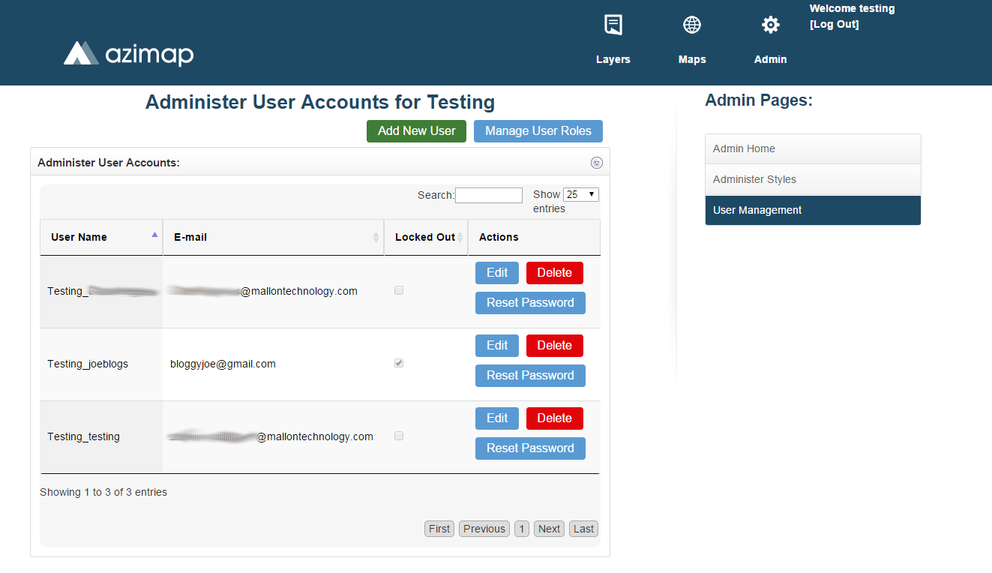
This is the Administrators Page. You can access it at any time by clicking Admin on the site header provided your account has administrator access. If you were the first to sign up for your company, you will have administrator access by default. You can then grant it to other users as shown in this section.
Select User Management.

This is the User Management Screen. Here, you can manage the users in your workspace.
Adding a New User
Select the Add New User button to bring up the New User Screen.
Note: The Add New User button is only active for Enterprise Accounts. Only Enterprise Users can add additional users.
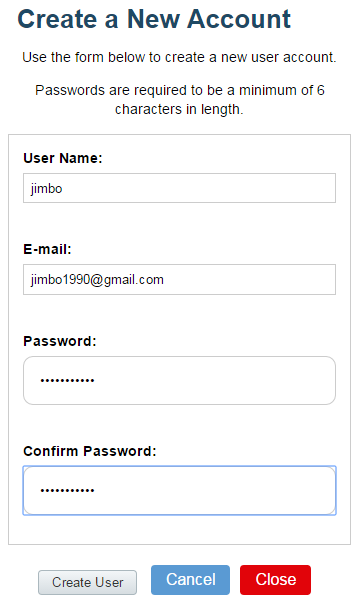
User Name - Enter a user name for the new user. This will be used as a unique identifier for them.
E-Mail - Enter the user's email address. An email confirmation will be sent to the user to confirm their account.
Password - Enter a password for the new user and confirm it. The password can be reset later if necessary.
Select Create User to create the user.
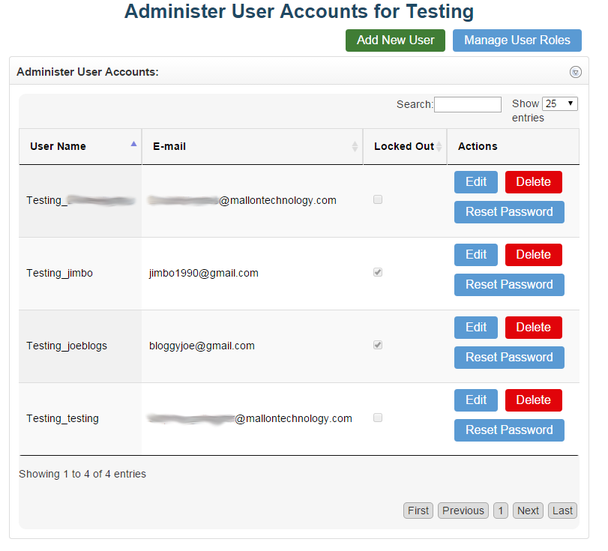
As you can see, the jimbo1990@gmail.com account has been added. The user name is displayed as Testing_jimbo in the Admin Screen only. This is so the administrators can see what workspace the user belongs to. The user will just login as jimbo1990@gmail.com. The user is currently locked out until jimbo1990@gmail.com receives the email confirmation and confirms the account through it.
If you wish to edit the email of a user, select Edit. Enter the new email address for the user and select Update. Select OK to complete the process.
![]()
If the user requests a password reset, select Reset Password.

Select OK to reset the users password.
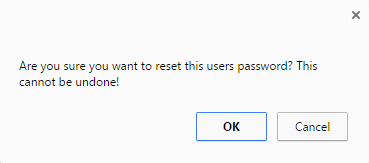
An email will be sent to the user to reset their password.
Managing User Roles
Select Manage User Roles to manage the roles of a user. Select a user from the drop-down menu and a list of all roles is displayed. You can then select the roles you wish to assign to the user.
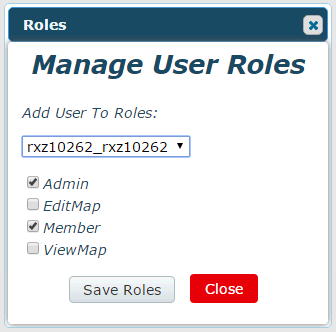
Select Save Roles.